LECTURES
*All lectures are noted in exercise blog.
Figure 2.1 Week 1 (24/04/2025) Module information booklet.
The objective of this assignment is to develop your skills in creating custom packaging solutions for items that do not come in traditional box packaging. By the end of this assignment, you should be able to demonstrate your ability to design functional, creative, and visually appealing boxes that enhance the packaging and presentation of non-boxed items.
Requirements Task Description:
1. Item Selection: Choose two non-boxed items from your daily surroundings. These items should not come in traditional box packaging but should be relatively small in size (e.g., a mug, a book, a pair of sunglasses, a candle, etc.).
2. Justification: Provide a brief justification for your selection of these items, explaining why custom box packaging would enhance their presentation and functionality.
Box Design
1. Box Structure: Create detailed diagrams or sketches of the box structure for each item, including dimensions, flap designs, and closure mechanisms. Ensure that the proposed box is functional and secure.
2. Prototype: Create physical prototypes of the custom boxes for both selected items. You can use cardboard or other suitable materials to bring your designs to life.
1.1 Progress
Before we start creating the box, we need to present our items. Initially, I brought a non-hardcover book and my body oil to Mr. Shamsul. He mentioned that the book needed to be hardcover, as it requires packaging for a specific reason. Additionally, he noted that the body oil's height is not 15 cm, which is the minimum requirement for this task. Unless I wanted to create a bundle, he suggested that I could propose a bundle consisting of the body oil, perfume, and hair tonic that I have.
The following week, I showed the items to him again, and he approved them. Now, I can proceed with creating my die line.
1a) Item Selection
1b) Justification
Because it elevates the overall experience and value of the book itself. While a hardcover already offers a sense of durability and presence, packaging adds an additional layer of protection during shipping, handling, and storage, keeping the book pristine.
Since my items are made from glass they need proper packaging ensures both protection and presentation. Glass is fragile, and without structured packaging, the products are at risk of breaking during handling, shipping, or storage. A well-designed box with secure compartments or padding prevents the items from moving around and colliding with each other, reducing the chance of damage. This is especially important for liquid products.
I also made some sketches about what I want the packaging to look like. For the book, I wanted the shape to look like the book itself, and for the bundle to look like a handbag, which was approved by Mr. Shamsul.
Mr. Shamsul taught us how to create a die line using Adobe Illustrator and how to make it compatible for export to the laser cutting machine. For Project 2, we need to develop a die line.
Here are the key points to remember:
- The point size for the die line in Illustrator should be 0.5 pt.
- When creating cut lines for the laser cut, ensure that your box design does not overlap with any other elements. It is advisable to delete any unnecessary lines and then combine the shapes.
- All measurements should be in millimeters (mm).
- For scoring lines or folding lines, change the color of the line so that the laser can differentiate between cut lines and score lines.
- Export the file as a DFX, and do not group the objects. In some cases, you may need to compound the lines.
- Save your file onto a USB drive and then connect the USB to the laser cutting machine.
- I made some rough sketches of the die line before using Adobe:
After sketching and measuring, I realized that most of the items in my bundle are made of glass. To ensure their safety, since the design may cause the items to clash when carried, Mr. Shamsul recommended using foam at the bottom of the packaging. However, I am concerned that if this packaging is lifted and walked with, the items will still collide with each other.
The book packaging is fairly straightforward; it resembles a standard square box. I was initially confused about how the laser cutting process would work, particularly regarding whether I need to create holes in the packaging for the flap to lock.
#1 Book Packaging
After the consultation, I started to work on my die line, Mr. Shamsul also said that the material I should use is called Art card. For the die line, I made the size and depth 1 mm bigger.
I also put a hole on top, to show the title of the book.
I began creating the first prototype for the book packaging using artboard. The size was fine, but the issue was that the hole I made was too big.
For the second prototype, I made some thoughtful updates to my die line (the one on the right). By extending the top flap just a bit, I aimed to create a more secure closure for the box. I hope this enhancement will ensure that everything inside stays snug and protected.
After that, I went to buy the material (art card) for the packaging. I used my friend's USB to transfer my file to the computer (thanks, guys!). From what Mr. Shamsul showed us when using the software, the black lines should be set to the "cut" option, while the scoring lines (in red) can be set to either "engrave" or "fasten" at a lower speed to ensure they don’t cut through. This way, the box can be folded neatly.
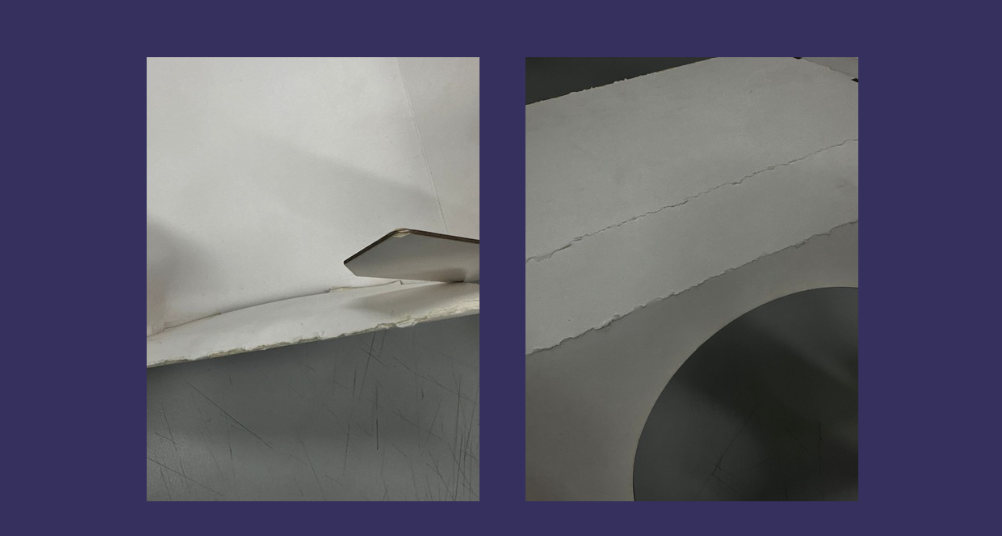
Once the art card was carefully trimmed, I faced another challenge: I had dialed up the laser's power too high on the computer settings. As a result, instead of a clean cut, the delicate paper became scorched, leaving it marred with deep, dark burns.
I’ve encountered another challenge with the art card; it simply isn't well-suited for folding. As you can see, I struggled while trying to bend the material, which resulted in the outer layer cracking and tearing. Frustrated by this setback, I decided to revert to using boxboard. Its flexibility makes it much easier to manipulate, and it offers a comparable thickness to the art card, providing the durability I need without the hassle.
After given last feedback, it is more practical to use cardboard, so what I need to do is to change the die line size, added 0.5 cm - 1 cm. Because the material is thicker than artcard, and so I can easily flip the carboard box.
#2 Bundle Packaging
The initial concept was to design packaging that resembled an elegant handbag, inspired by the allure of fashion and style. However, due to the delicate nature of my products, which are crafted from glass, this handbag idea has been set aside.
- First die line (handbag):
After sharing my concerns with Mr. Shamsul, he acknowledged the issue at hand. As illustrated in the top image of the dieline, I had originally designed a wall-like structure to separate the items. However, Mr. Shamsul suggested that this approach wasn't the best fit. Instead, he encouraged me to implement distinct sections for better organization.
Taking his advice to heart, I revamped my dieline entirely, eliminating the handbag concept. I realized that merging the handbag with separate sections would complicate the design more than necessary.
This brings me to the section idea I mentioned earlier:
I struggled to create the die line and measurements. I am planning to make either two or three sections for the box. Mr. Shamsul also suggested using corrugated cardboard as my material to ensure that my product is secure and safe enough.
I know the material is not fit for this packaging, but i just want to try the dieline itself, which i still need to work on. In this, I made 2 sections. Which is not fitting.
The idea is that the small gaps is to secure the sections. While I'm still not sure how this will turn out, and since I have quite of cardboard, so I give it a try at laser cutting.
The size is just right, but I’m facing an issue: it lacks the security and snugness I need. The gaps, which I initially thought would add functionality, have unfortunately compromised the integrity of the sections, making them more prone to bending and folding, exactly what I wanted to avoid. Therefore, I’ve decided to redesign the die line, eliminating the gaps to ensure a sturdier and more reliable outcome.
Also, I notice some sections are too short to fit into the gap.
I'm confident with this one, I remove the small gaps, and increase the flaps height.
Somehow the box is smaller than before, but overall I like the design, so I change the die line again to increase the height. And finally I get the size that I want.
I forgot to take a picture of another fail attempt I did after the last feedback on week 14, I tried to make holes for the top and bottom to fold the flaps, but it doesn't function quite well because t
To ensure the safety of my inner box, it’s essential to construct an external box that will safeguard the precious items held within. As I embark on this project, I find myself grappling with the challenge of determining the ideal dimensions to accommodate my inner box, especially due to the thickness of the materials I’m working with.
1.2 Submissions
- Box 2 - Bundle (Body Oil, perfume, & hair tonic) Packaging
Week 5
The items are not match for the requirements, and need proper justifications. The hair tonic I bought is too small; instead, I can use it for a bundle (add more 1-2 products), and the book needs to be a hardcover.
Week 6
After showing the sketches of my box designs, the bag idea needs adjustments regarding size and determining its practicality.
Week 7
The die line needs more accurate fixing, and to ensure my file can be exported to the laser cut machine, I need to redo my die line according to
Week 8
Change the material for the book packaging from art card to cardboard, because after a first-hand view, the material won't keep the book safe and firm. For the bundle packaging, I can try to change my die line to make the sides and flap tighter.
Experience
This task required a lot of changes, patience, and savings on my part. I believe my time would be more efficient if the laser cut room were open until 9 PM. The reason it took me so long to redo my failed attempts was that I had to wait for other students to finish using the machines. Most of the students I’ve seen are from architecture, and their work often requires hours to complete. Nevertheless, I'm glad I was able to finish my packaging and resolve my errors on time.
Observation
When designing the die line for the flaps, it's essential to account for an additional margin of 0.5 to 1 cm. In this instance, since we’re working with cardboard, which has a thickness of 0.5 cm, this extra allowance ensures a perfect fit. This step is crucial for achieving the best possible results in your project.
Findings
Folding the box demands a keen eye for precision and an unwavering commitment to neatness, particularly around the intricately engraved sections. This attention to detail is crucial when working with cardboard materials, as they have a tendency to easily show the imprints of our fingers, maring the clean lines and overall appearance of the box. Ensuring every crease is sharp and every edge is aligned can make all the difference in the final presentation.


Comments
Post a Comment